
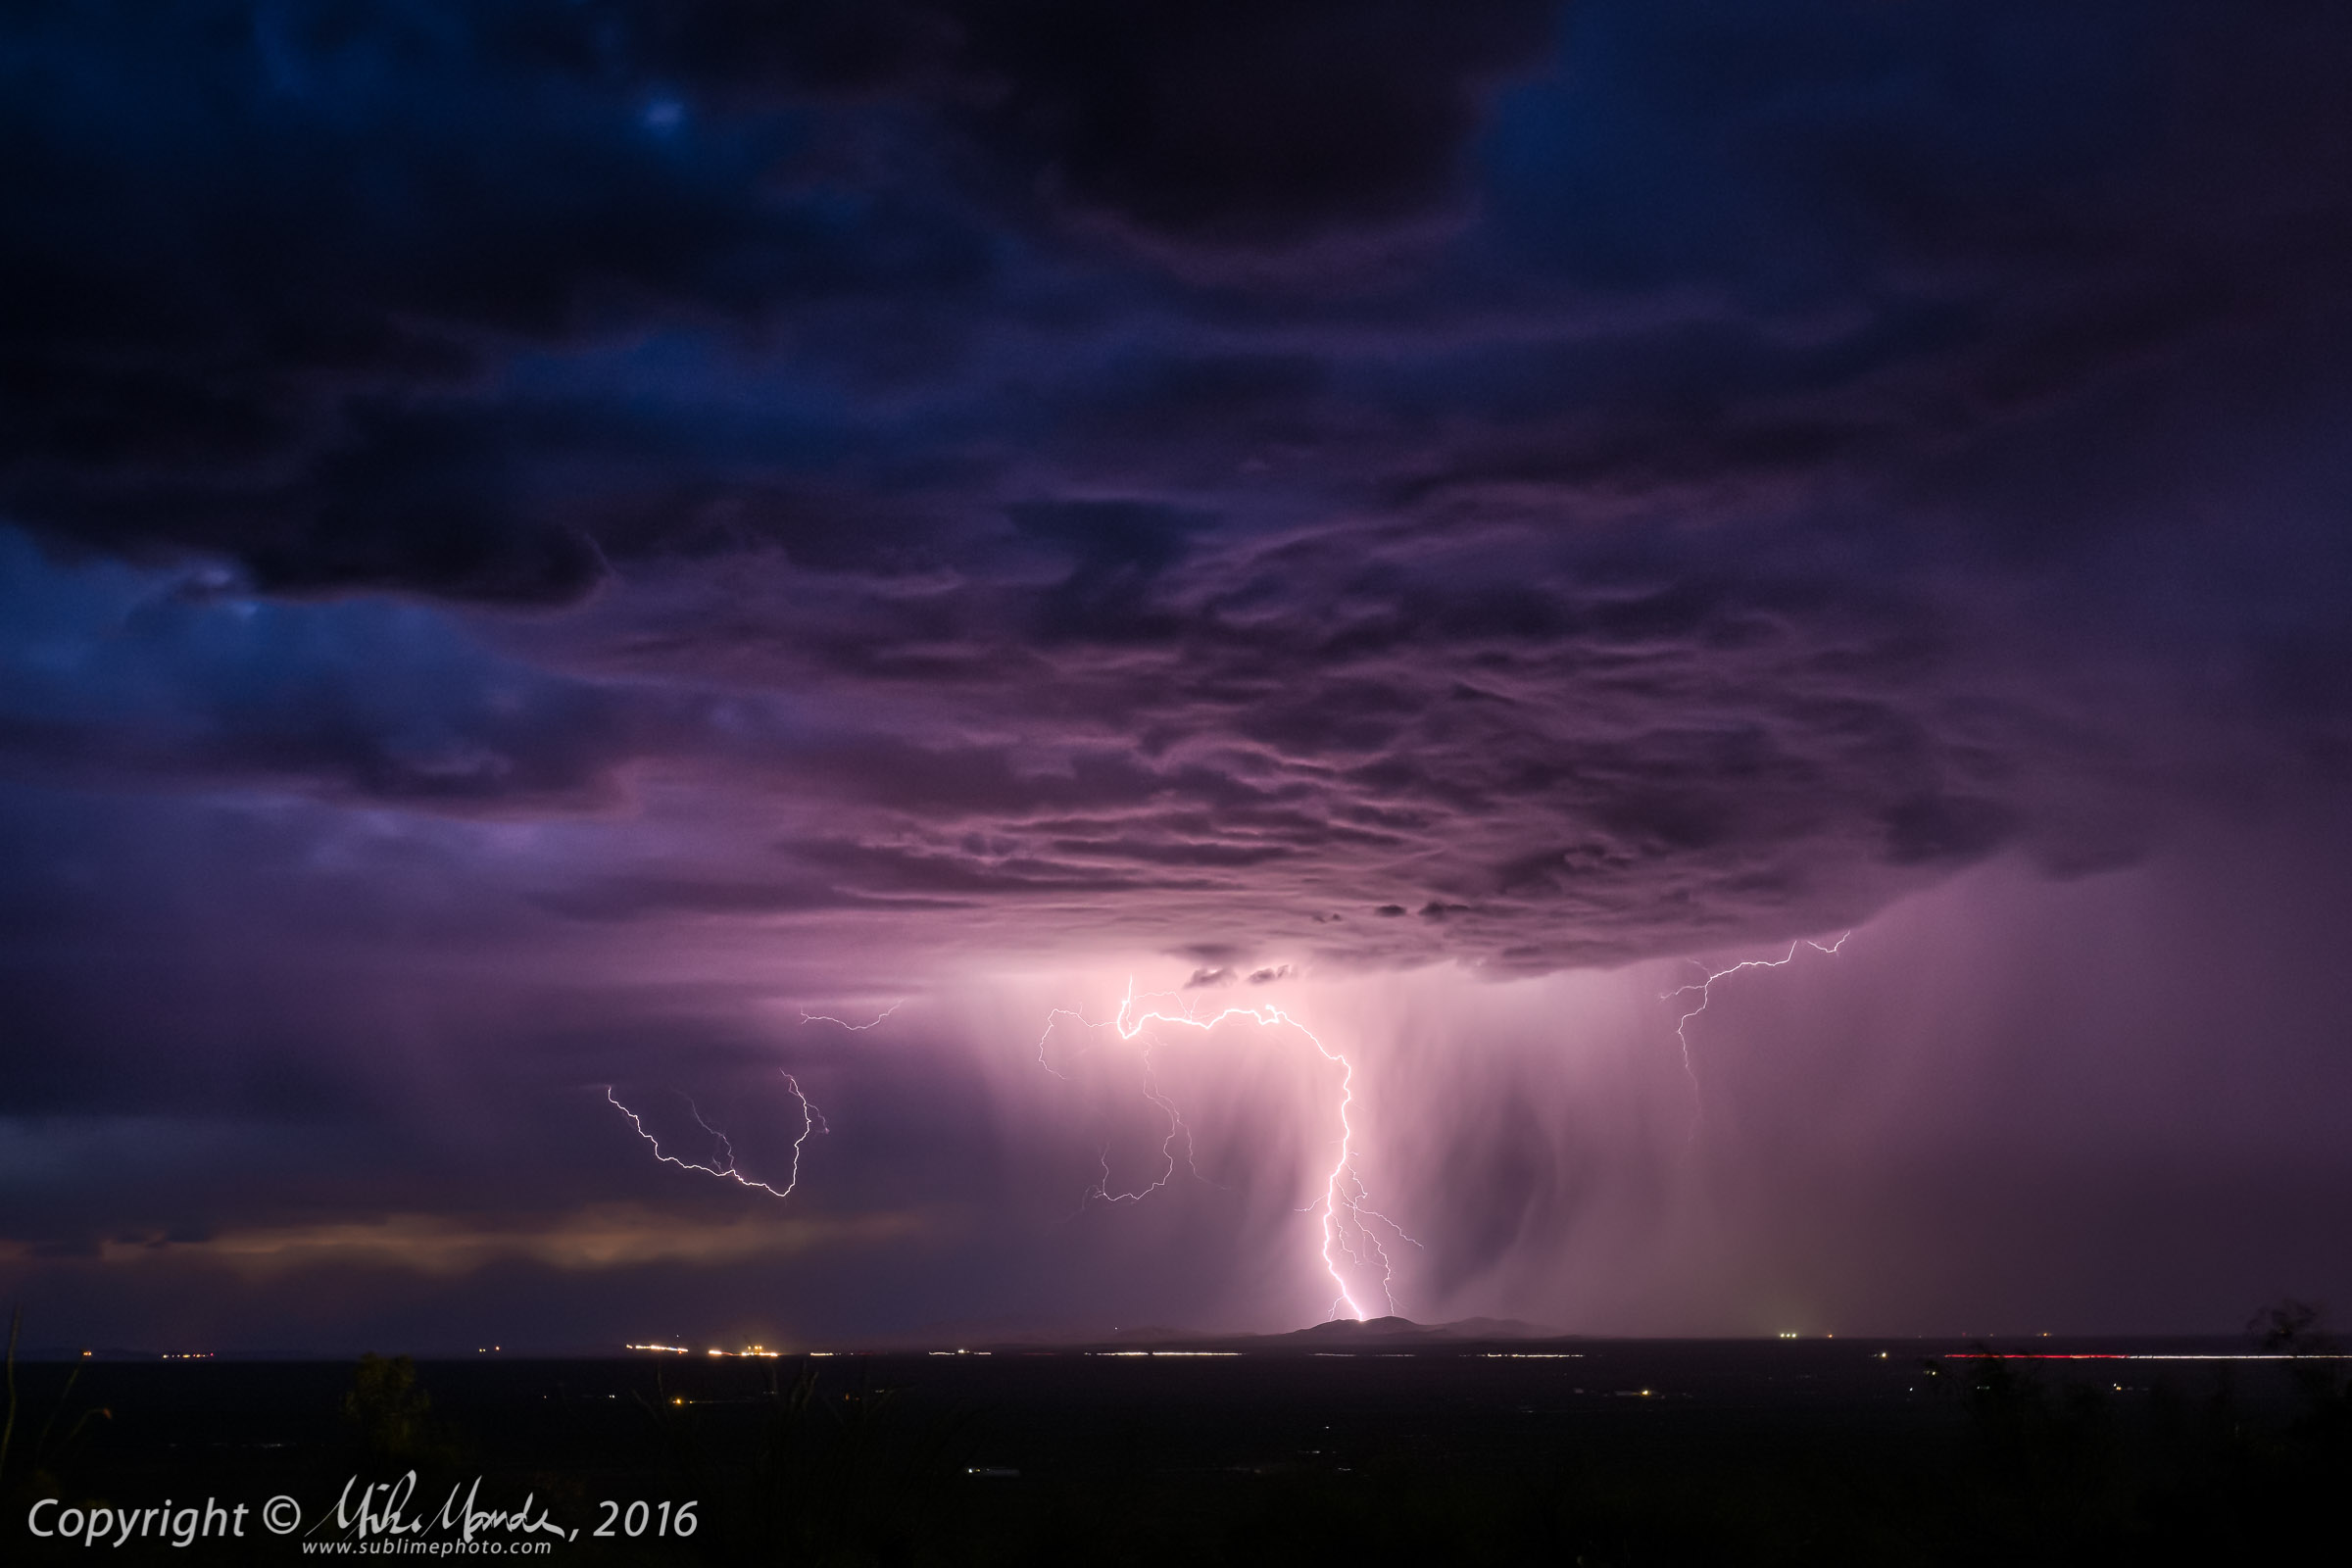
Lightning over White Sands, New Mexico
I am back from a three week road-trip to the Southwestern US. This time, it was a trip through Washington, Oregon, Idaho, Nevada, Utah, Colorado, New Mexico and back, for a total of 8,945 km of driving. The furthest south was White Sands, New Mexico, where the above photo was taken at dusk. Actually, the shot is looking towards White Sands from Oliver Lee State Park to the east.
Not only is this blog posting about sharing a few trip images, prior to getting some full galleries posted, but also to discuss X-Trans sensor raw conversions, specifically how the latest Adobe Lightroom CC compares to PhotoNinja with images from my Fujifilm X-Pro2. While Adobe has significantly improved their Fujifilm X-Trans raw processing, eliminating many of the original obvious drawbacks, such as badly smeared colour details, strange blurs and/or outlining along high colour-contrast edges and so on, there are still some weaknesses. One is that fine texture details with strong colour contrast still seem to lack definition (nowhere near as badly smeared as before though) and that detail in shadows, and not just ones that have been dramatically pulled up in post, often seems to look muddy and rather blurry. By the way, you can click on any of the shots in this posting to bring up a much larger version. Just click the back button in browser to return to the post after...
Also, if you just want to see images from the trip and don't care about raw processing, click to see all the blog postings from my 2016 June Southwest Trip...
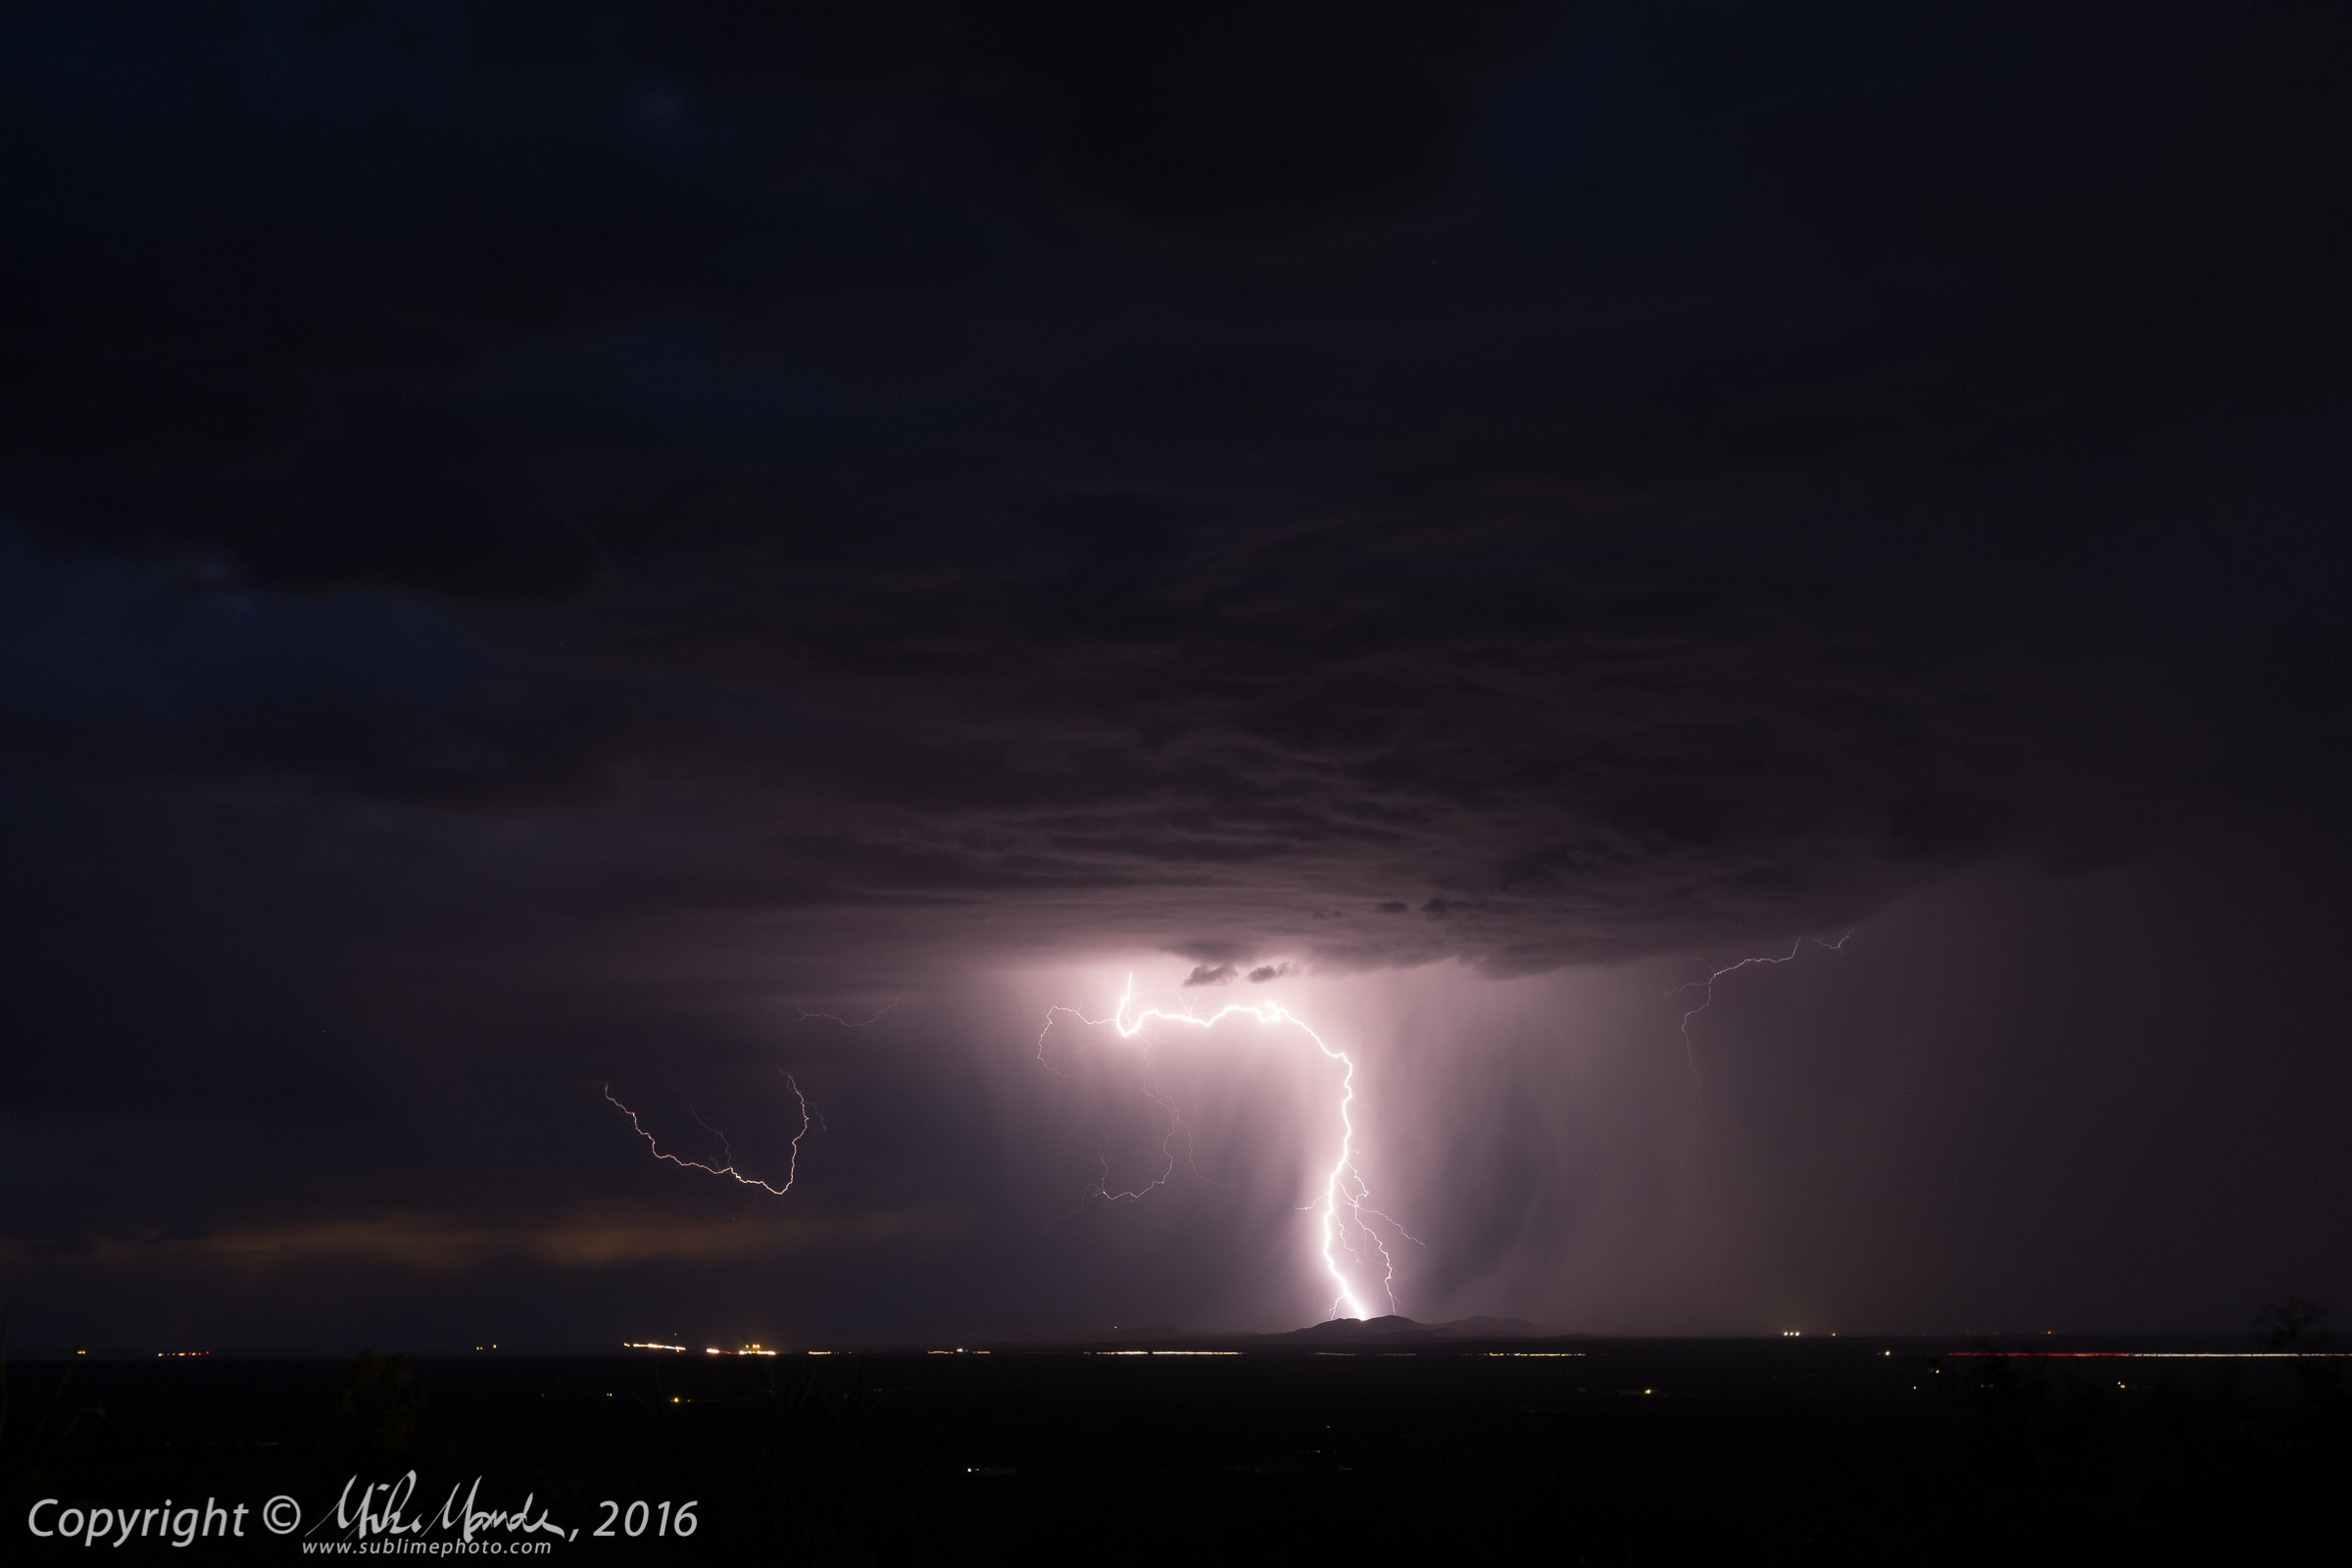
Muddy shadows are a shame since the X-Pro2 does have quite flexible raw files, and I will often underexpose a shot in order to preserve highlight details, with the intention of boosting the shadows in post. An example is the above lightning shot and no, the above version is not how it looked out of camera! I did mess with the contrast, shadows and vibrance, although I did not "paint" in any added colour. The blue you see above is from late twilight blue sky showing through the clouds, contrasting with the purplish lighting discharge. The colour was all there in the deep shadows, waiting to be recovered. Below is the rather less dramatic version, how it looks when you initially bring it into Lightroom with no adjustments at all...
Yep, I messed with that shot a lot, more than I usually do, but it illustrates what one can pull out of the shadows of a raw file. That said, there is a noise penalty when you are pulling up shadow detail to that extent on a 30 second night shot, with no long-exposure NR and taken on a really hot evening in the Southwest!
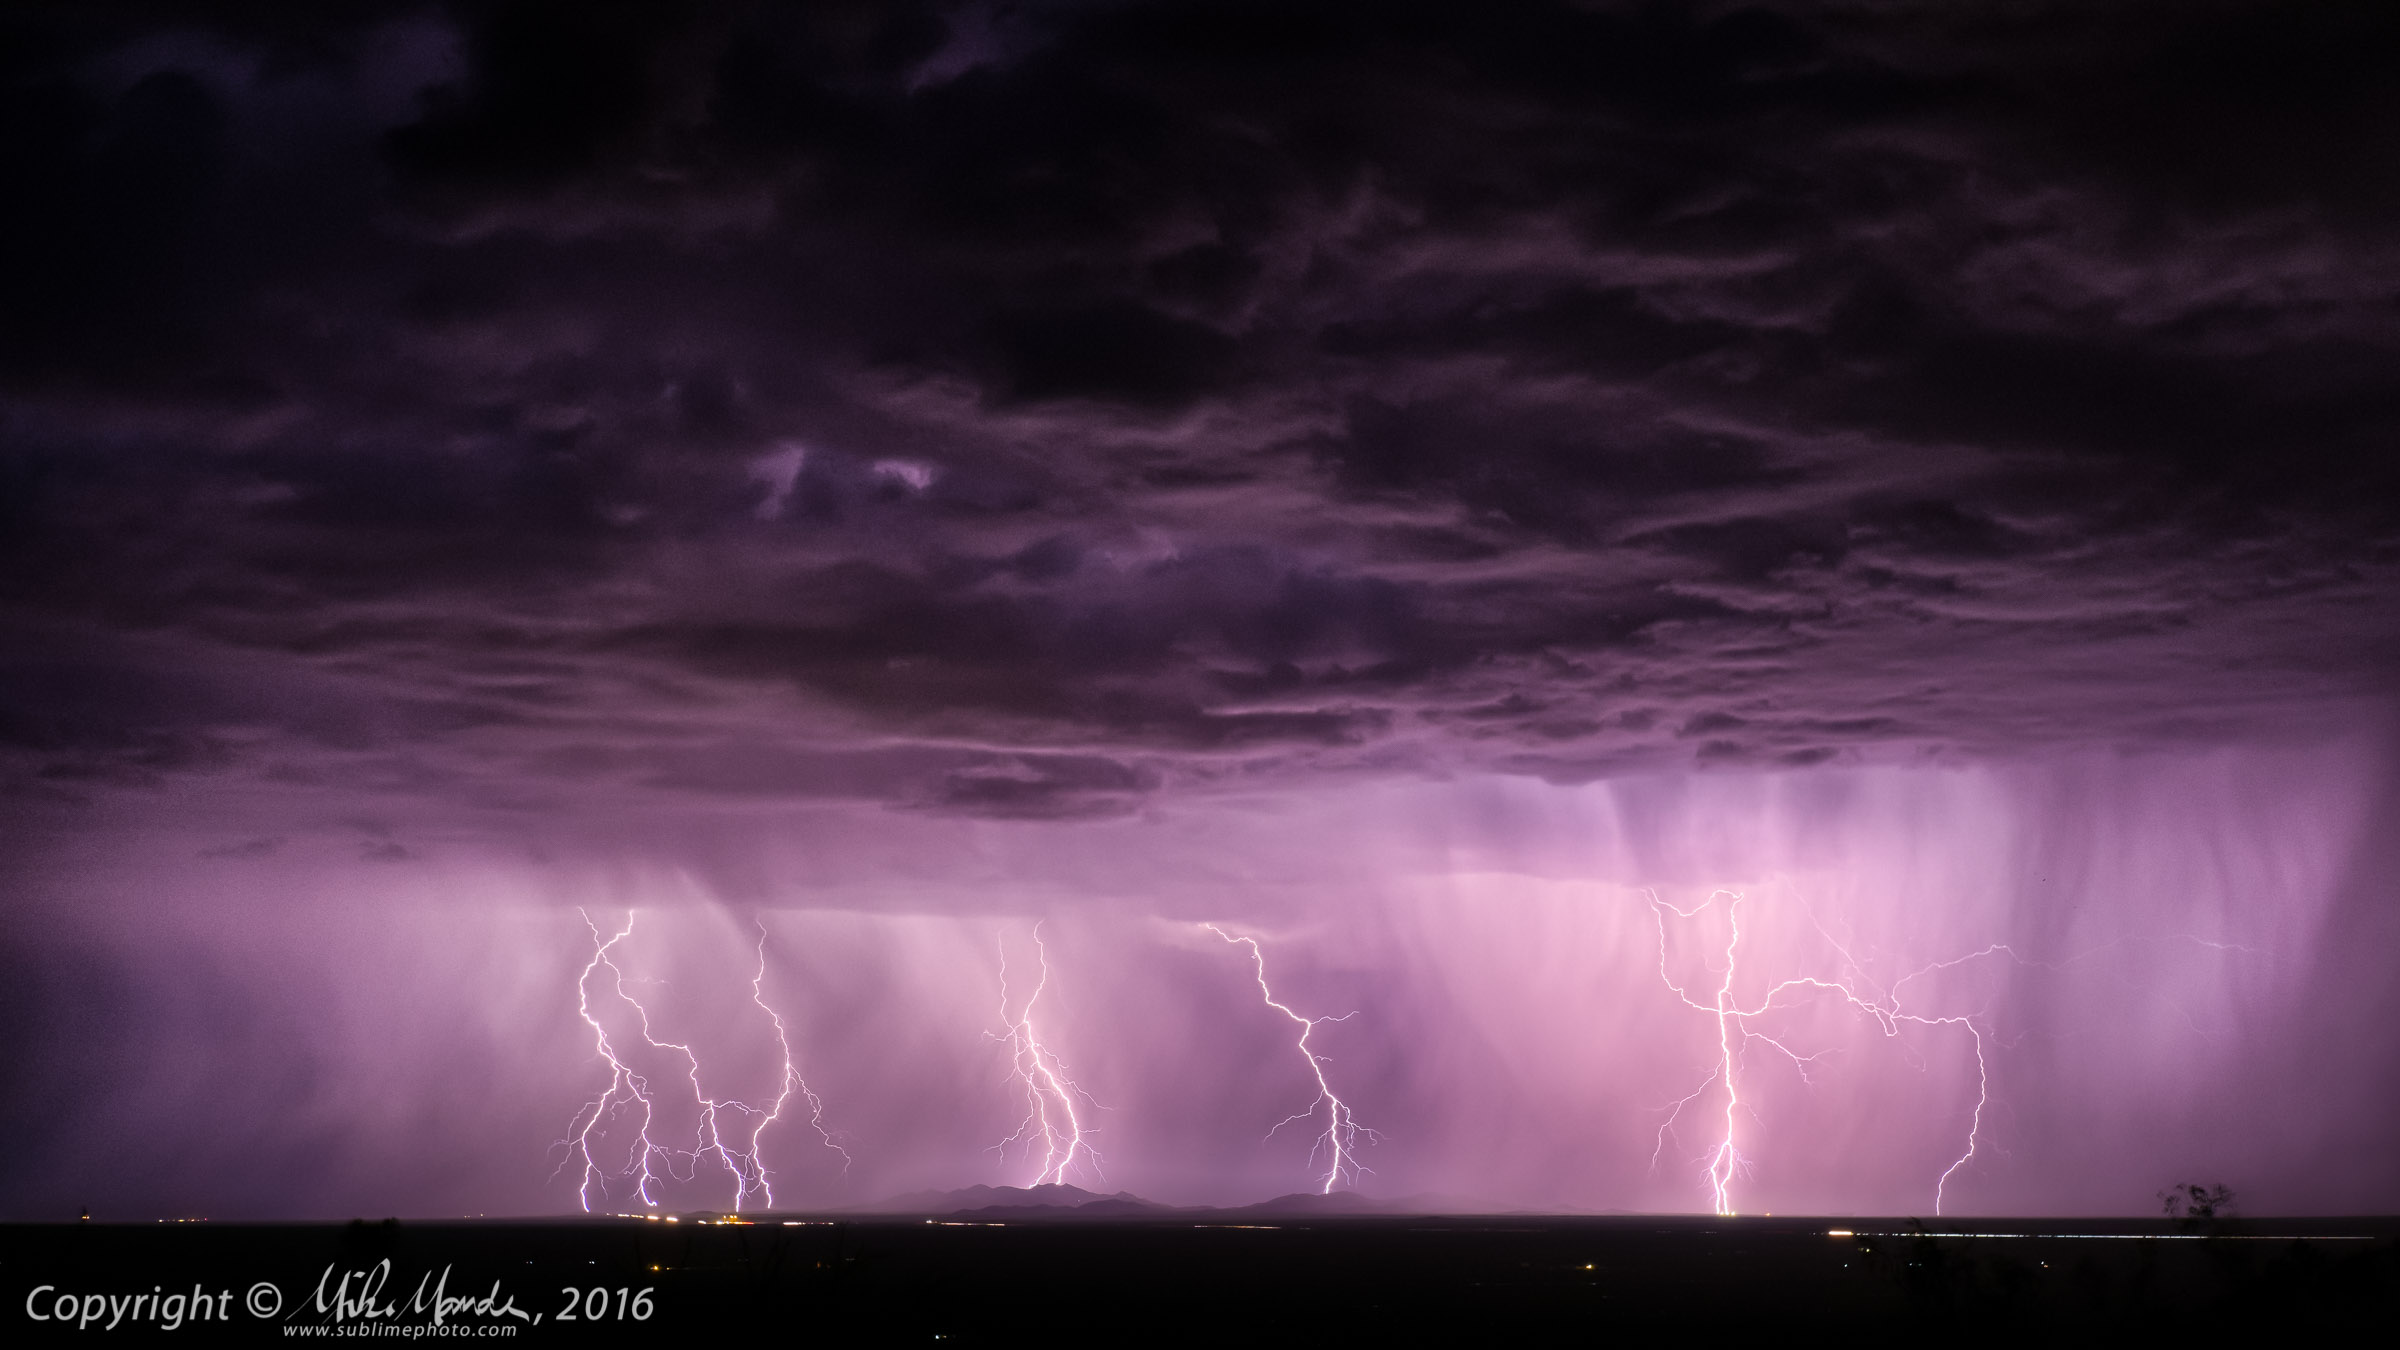
Here is one more from that dramatic storm, this one later in the evening with no more twilight blue remaining. Both shots were 30 second exposures, which is why it was easy to capture multiple strikes...
So, now to the raw processing comparisons. Let me show you some detailed examples of the shadow detail differences between Lightroom and PhotoNinja. Here is first sample shot...
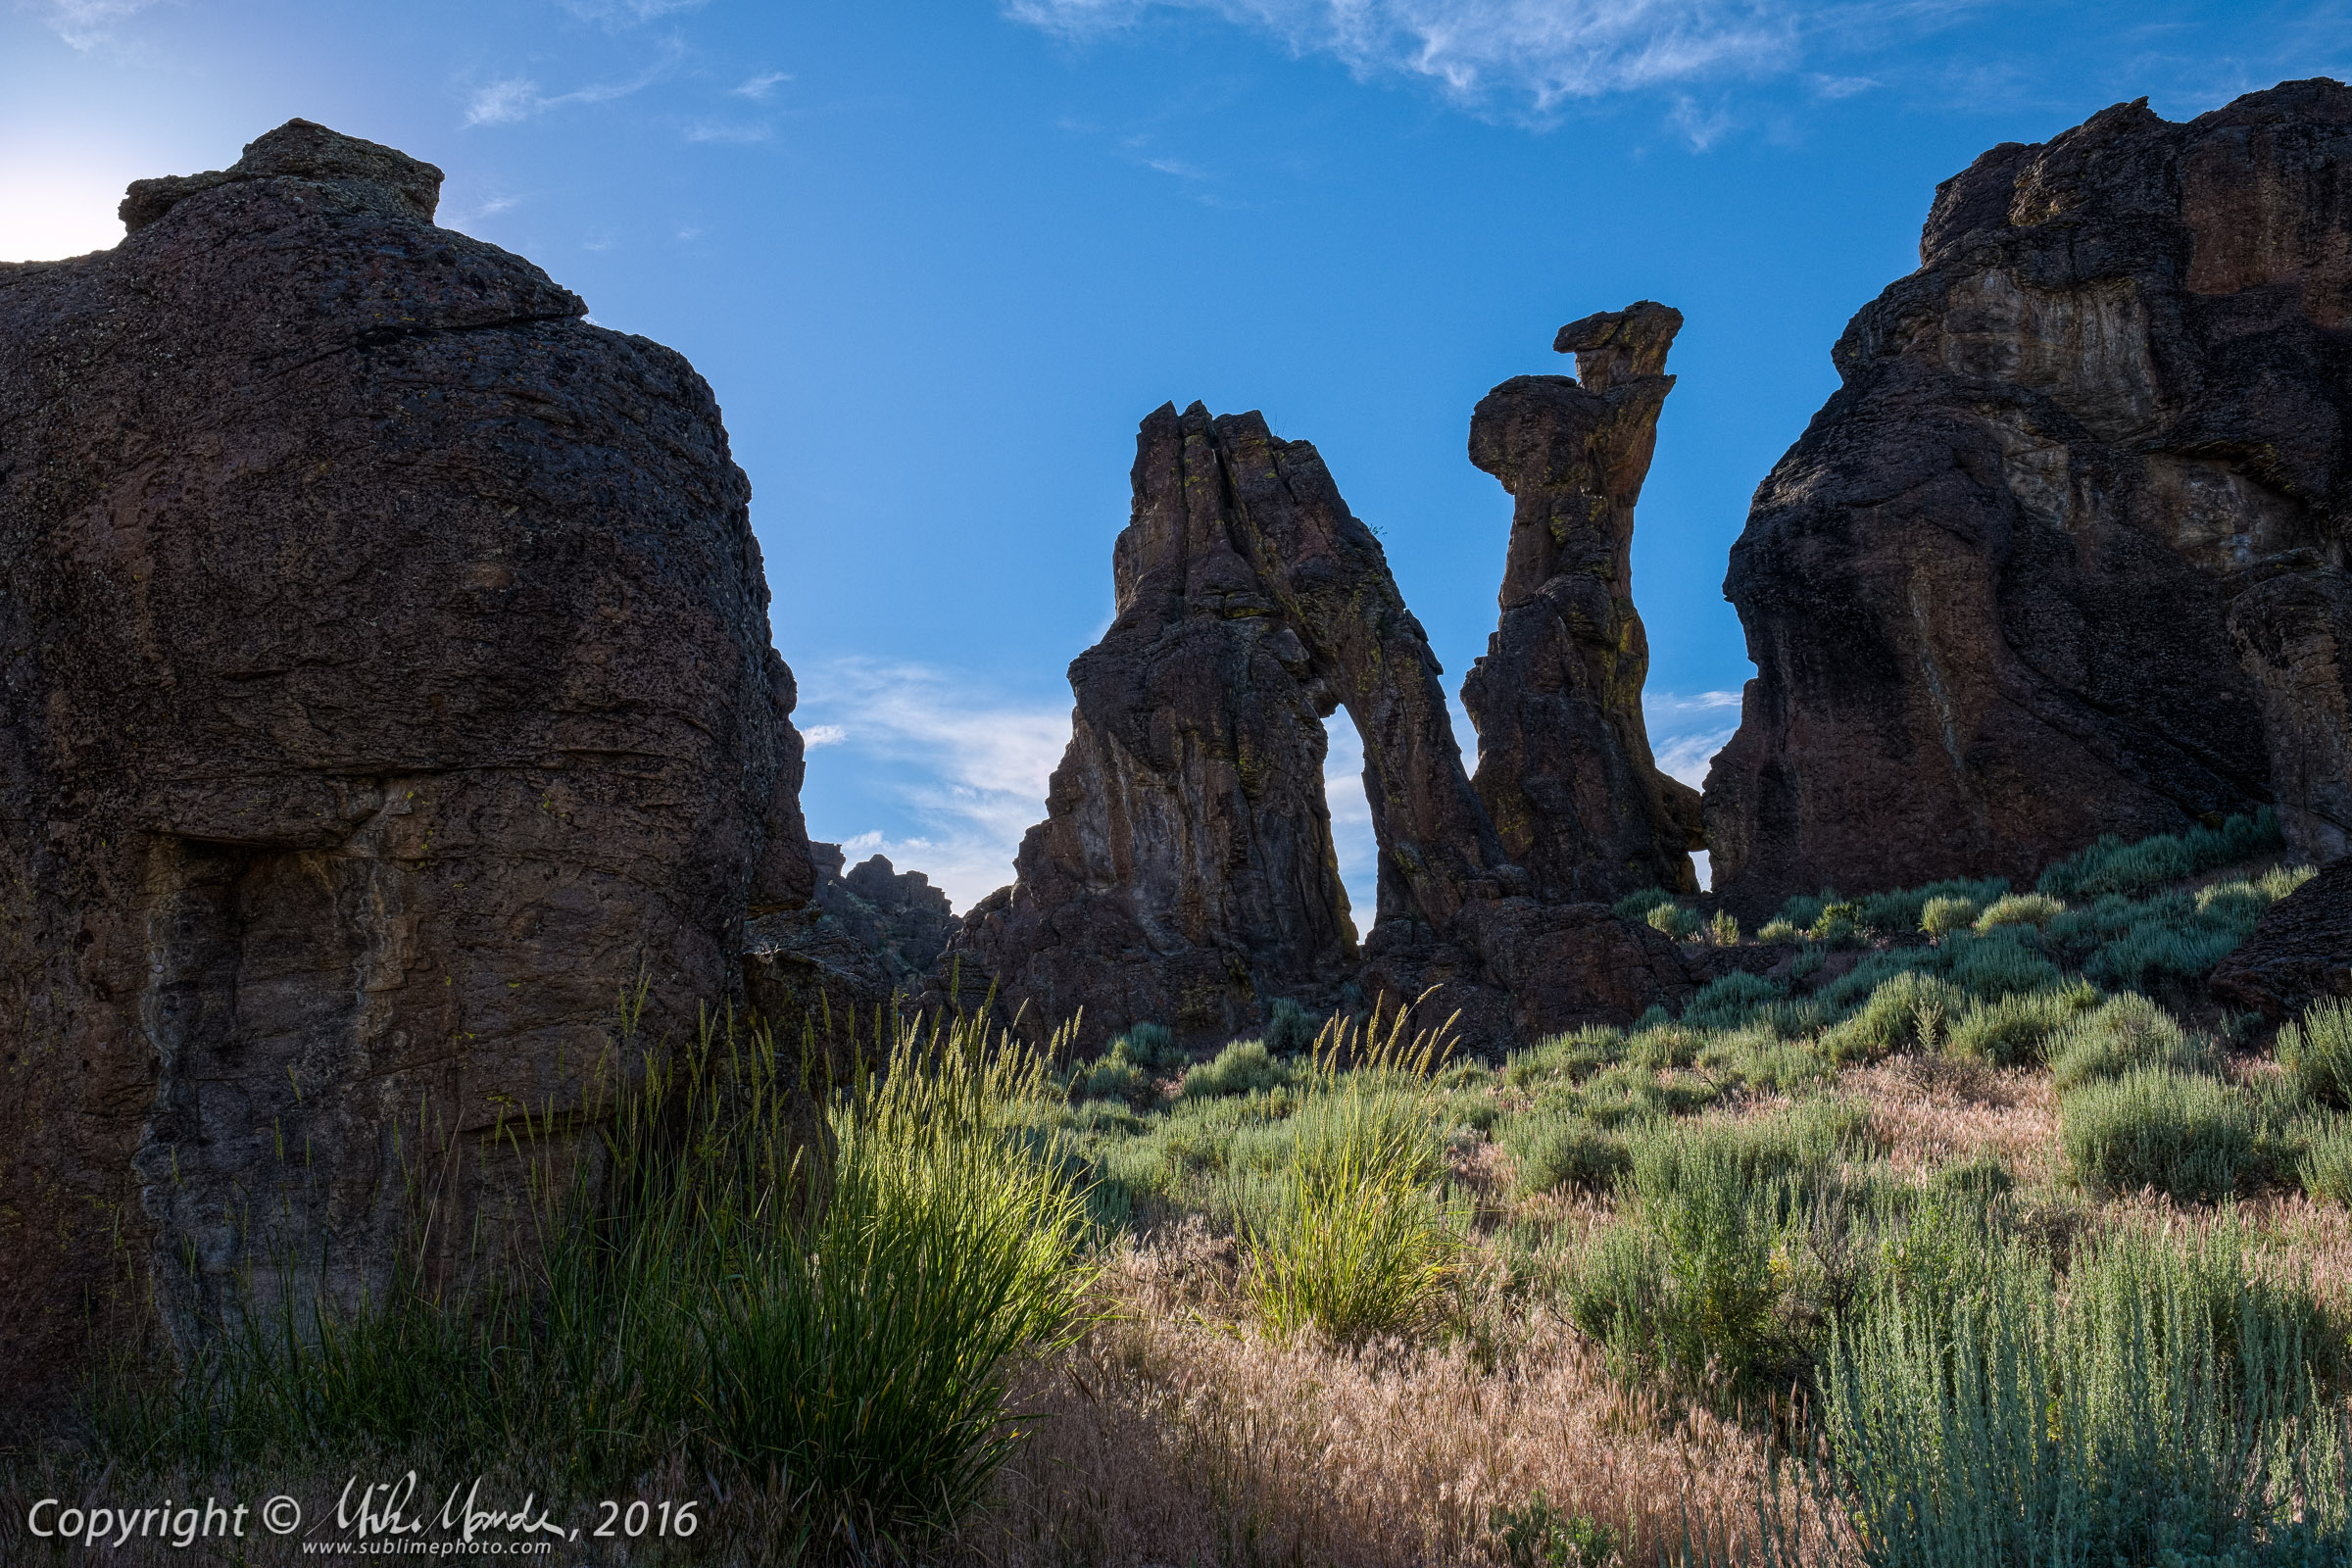
Little City of Rocks Wilderness, Idaho
With the sun just behind the rock, to the upper left of the frame, I underexposed the shot to maintain as much blue sky as possible, then pulled up the brightness of the shaded dark rocks in post. Below is a screenshot from Lightroom, showing the PhotoNinja Processed version on the left and Lightroom on the right at 1:1. When the image opens after you click on it, make sure you zoom into 100% view to avoid browser image scaling, which might obscure some of the differences. Also remember to click your browser's back button to return here...
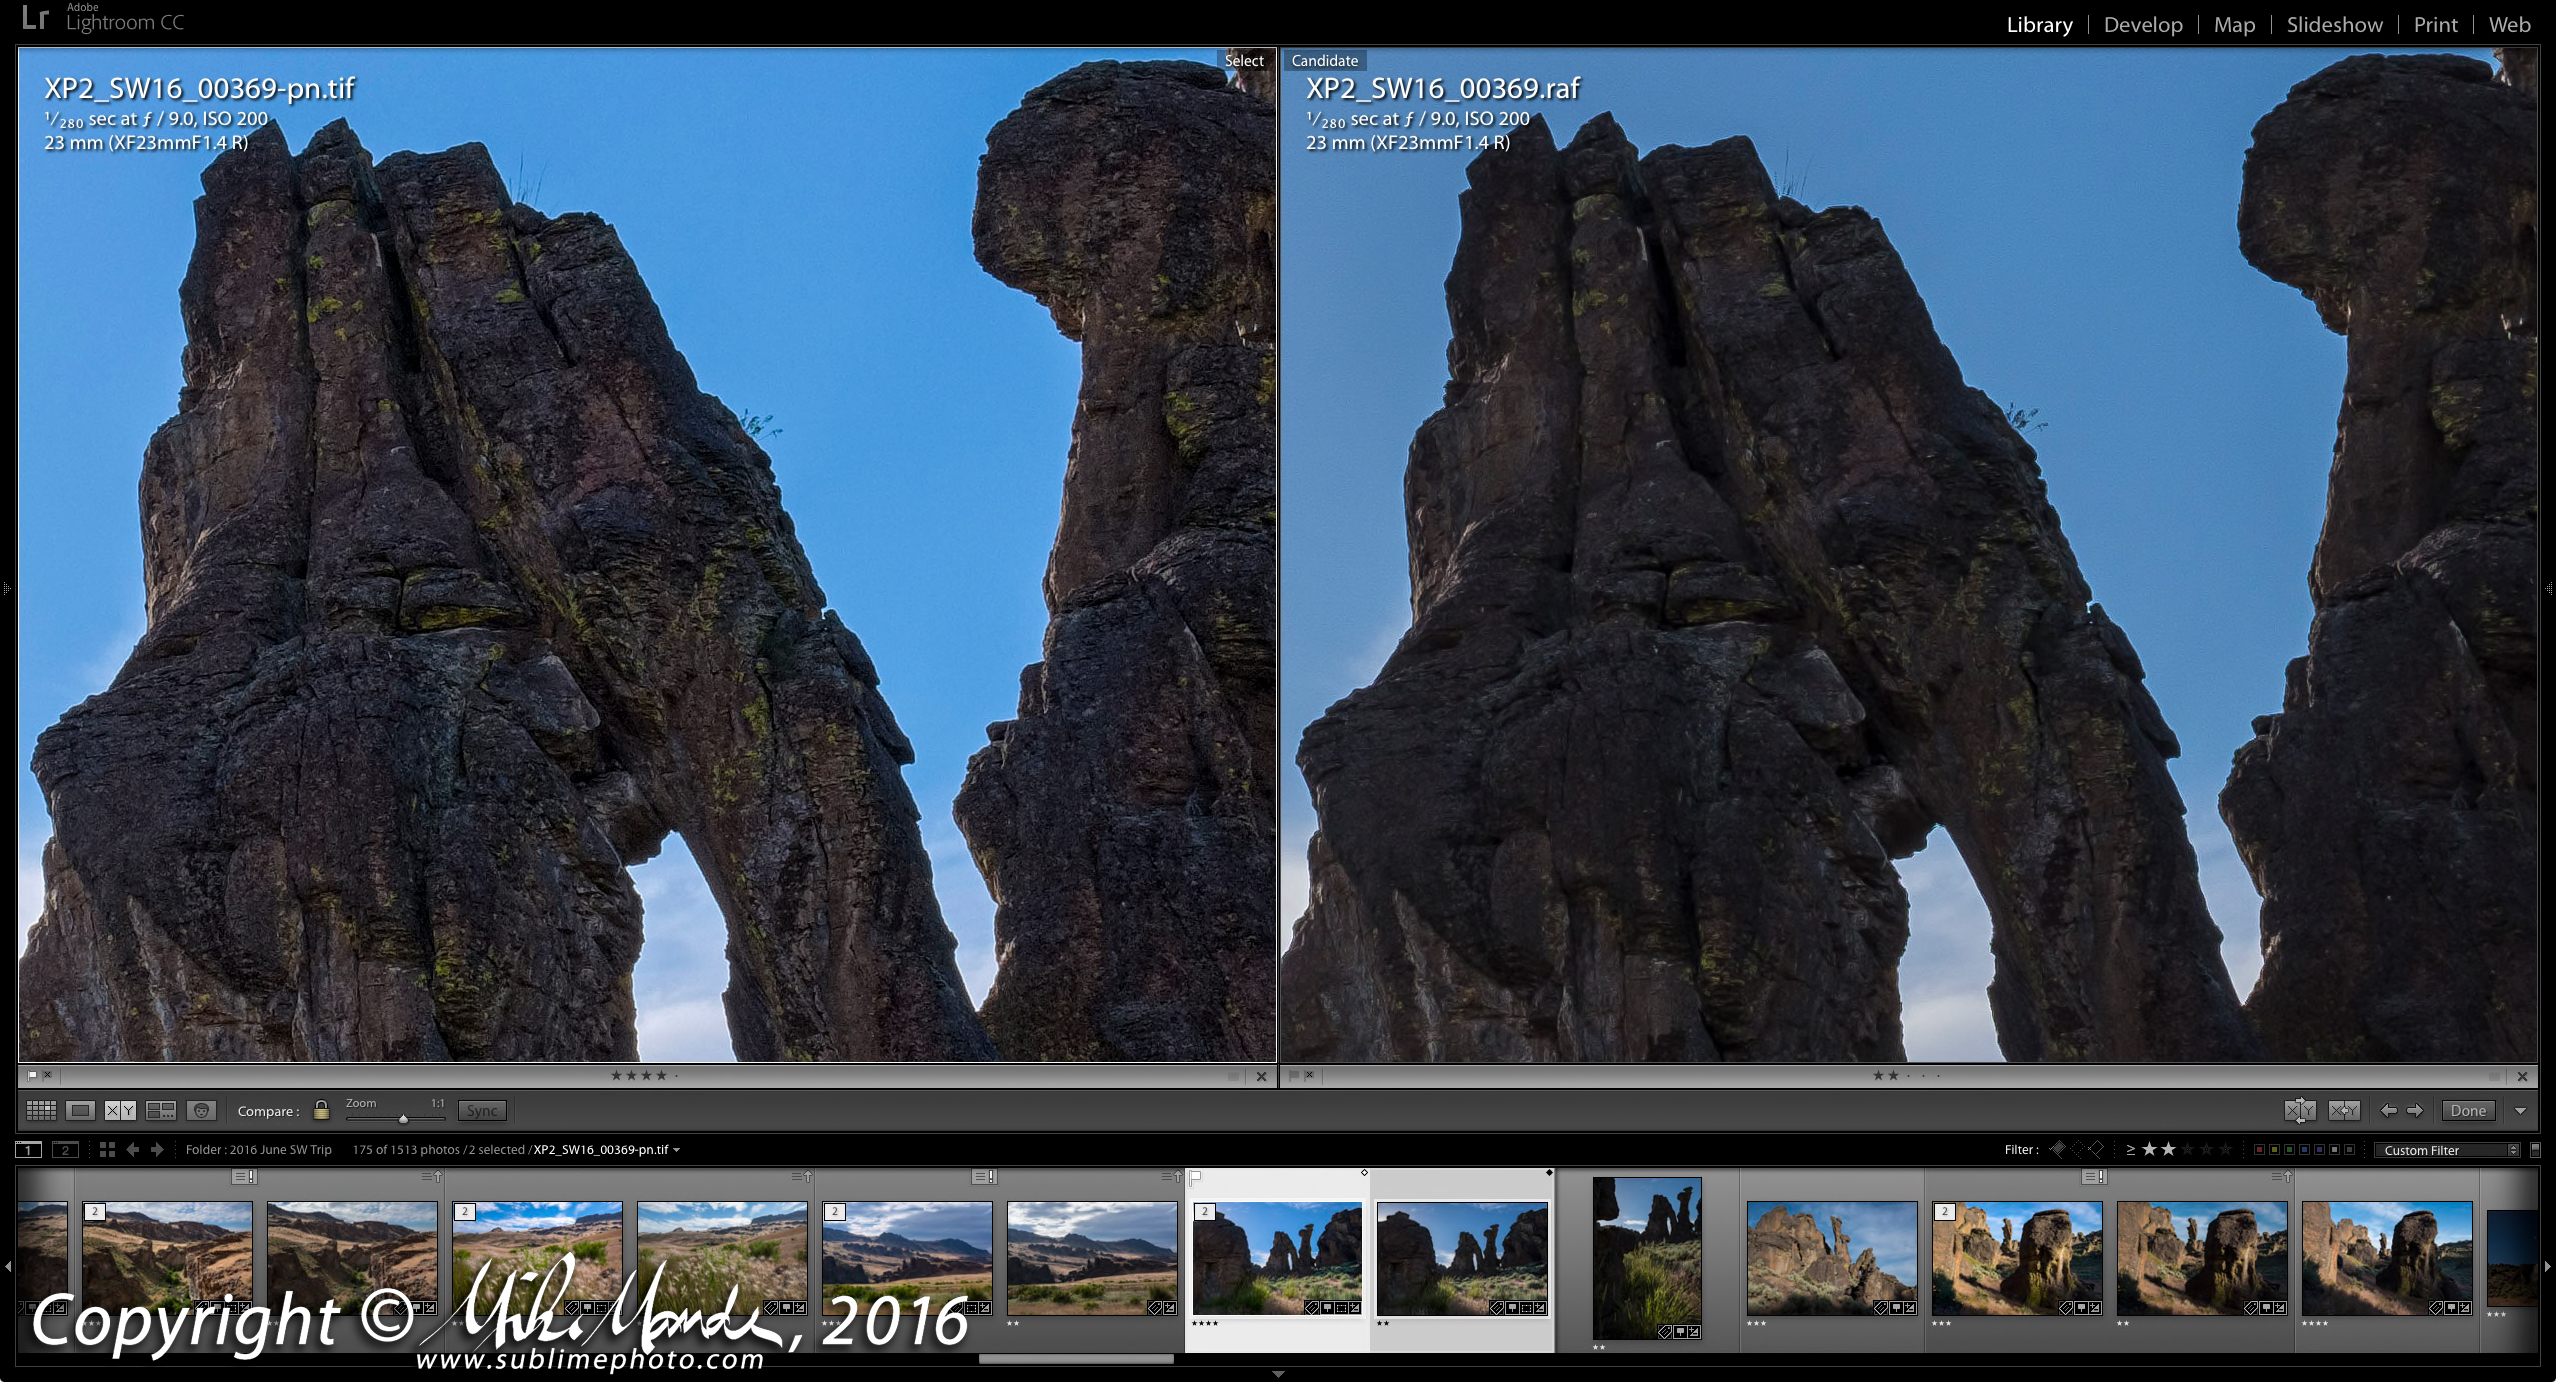
Pretty darn dramatic difference, isn't there?! The subtle colours and textures in the shadows are mostly lost in the Lightroom version, giving a muddy, slightly blurry result. Here is a different spot in the same shot...
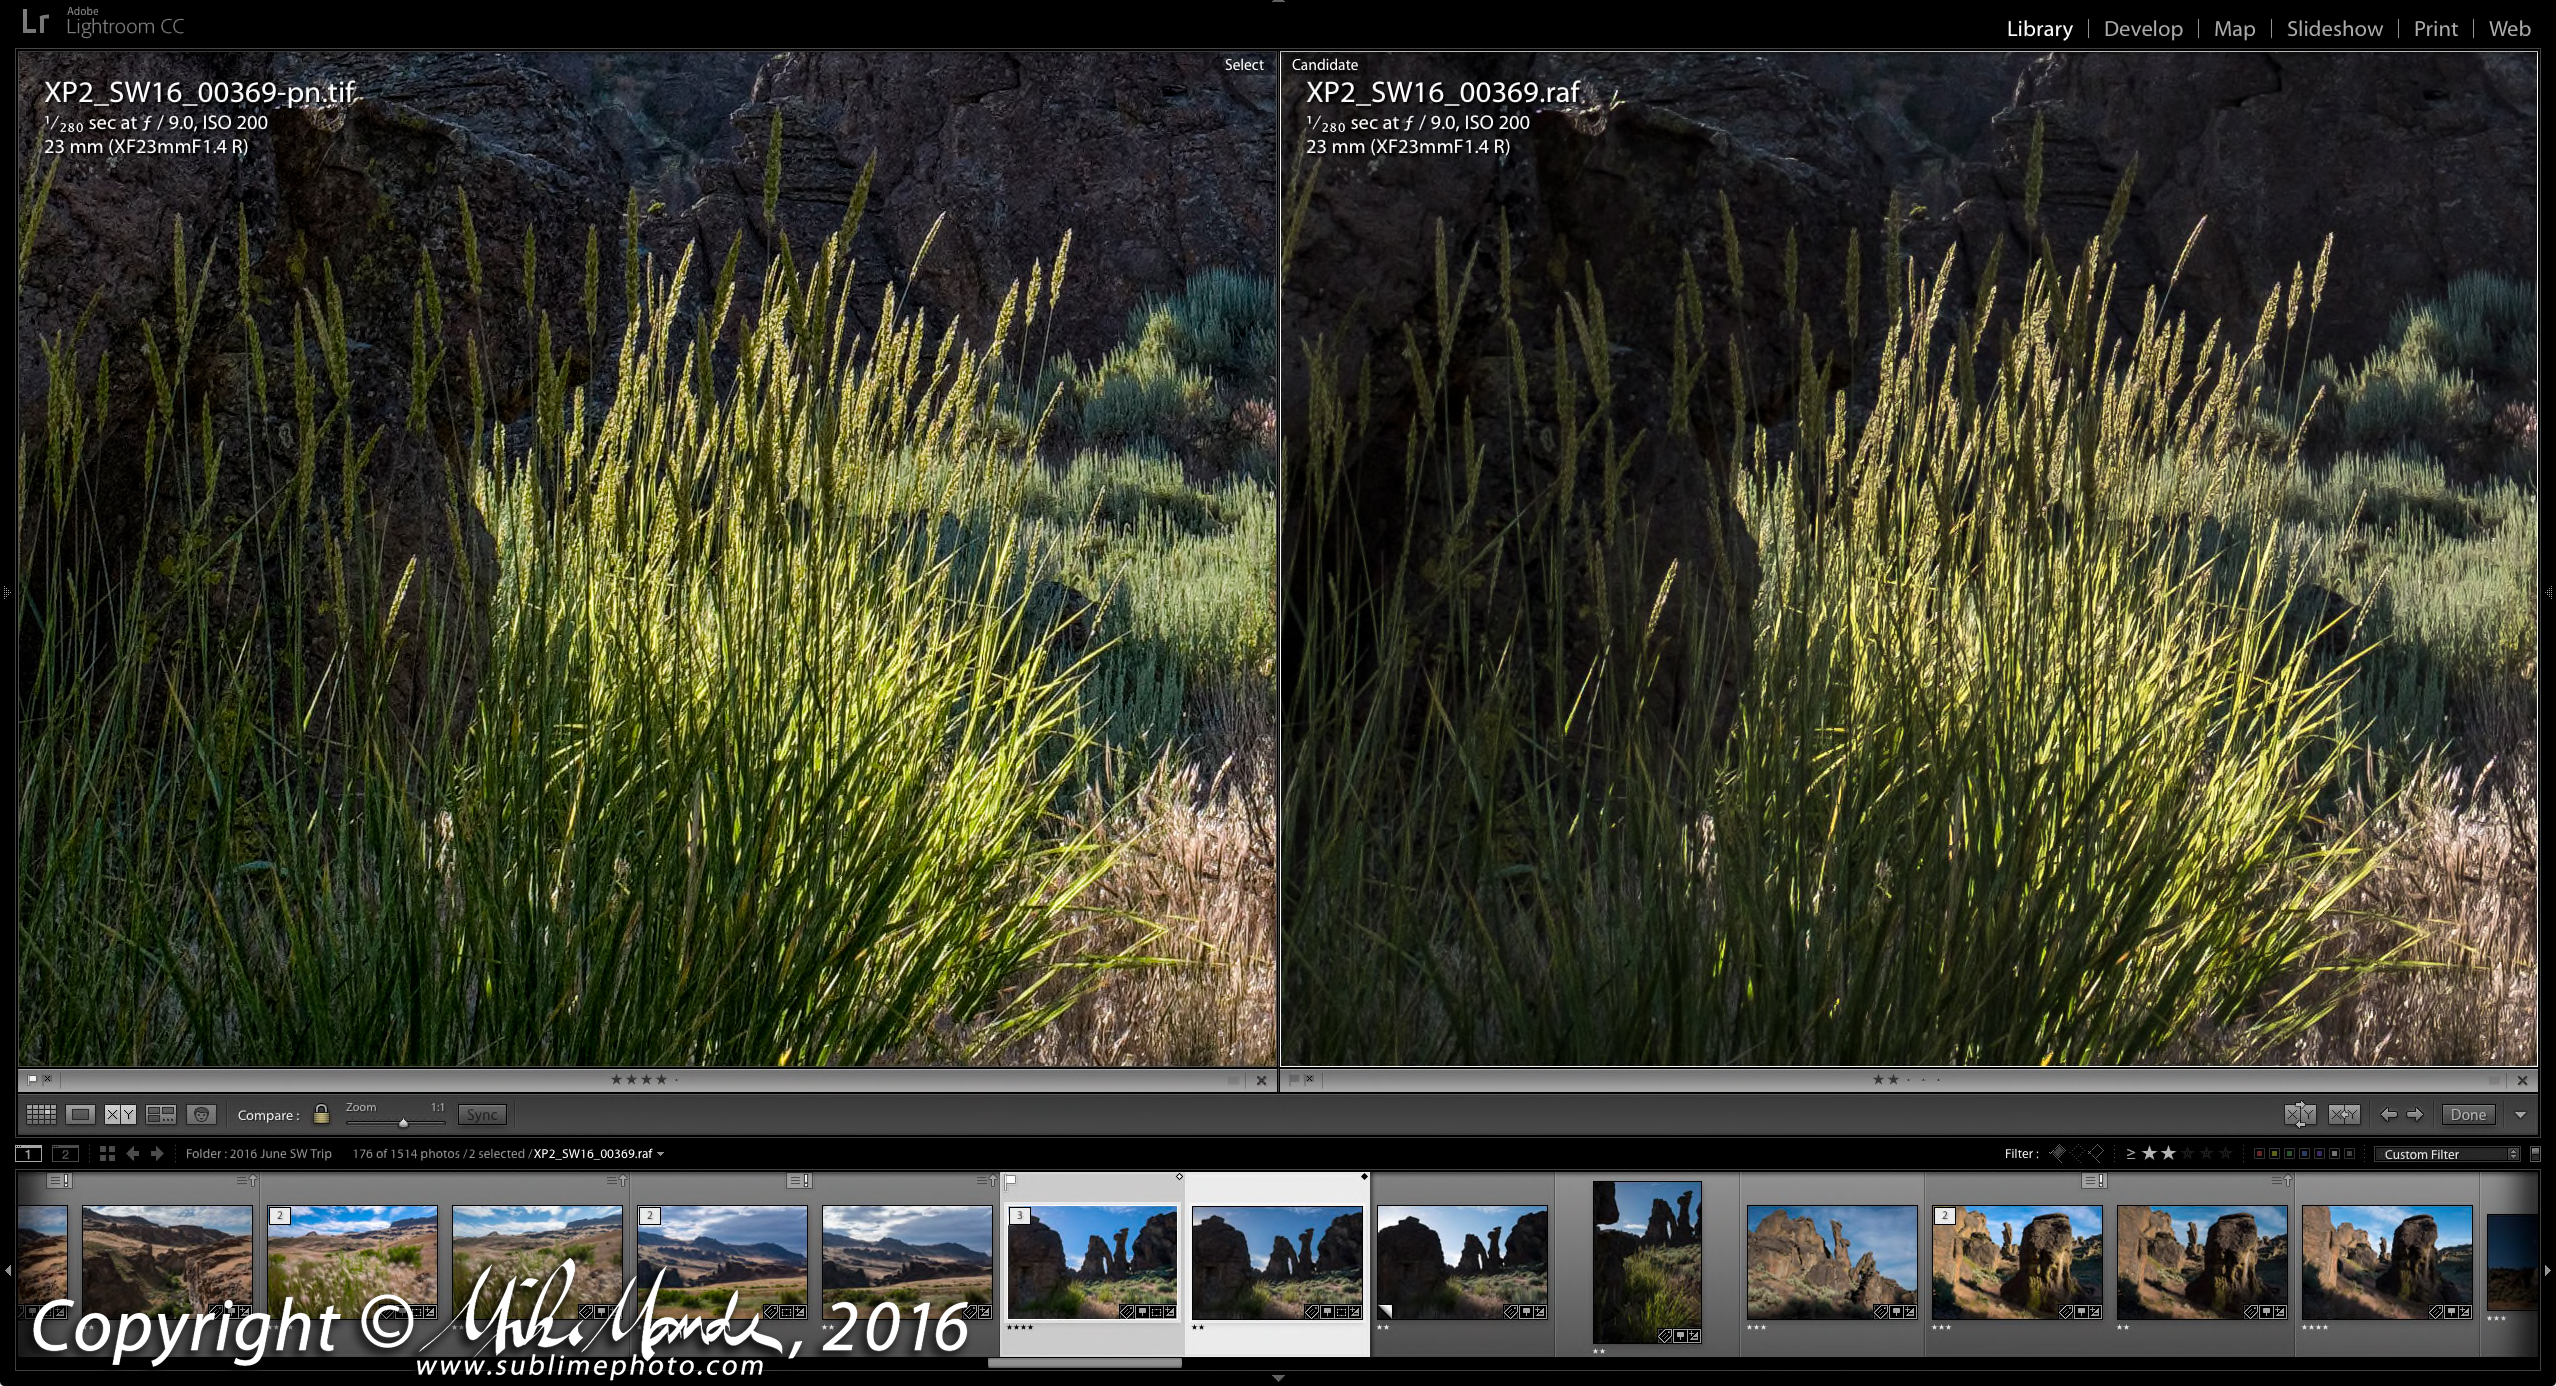
If you look at the sunlit areas, Lightroom is doing great and there is virtually no advantage in the PhotoNinja version. However, look at the grass stalks in the shaded area to the left: suddenly the Lightroom version is looking blurry and lacking fine details, yet the PhotoNinja version maintains full detail and sharpness in the shadows. This "differential processing" that Adobe's raw conversion software is doing, where shadows are handled differently than midtowns and highlights, just irks me to no end at times. I understand why Adobe is doing this since it can really help to prevent noise from creeping up in the shadows, but I really wish there were a slider labeled "Protect Shadows" where one could choose to prioritize detail or smoothness (noise reduction). Some NR in shadows would be desirable, but this heavy handed hammering away of detail in the shadows is unnecessary for a great many shots.
Adobe doesn't just do this differential processing with Fujifilm X-Trans sensor raws of course, but it seems more dramatic to me than on the average Bayer-sensor raw file. By the way, the Lightroom versions above had NR completely disabled; both the luminance and chroma sliders were at zero. Of course, with enough effort, one can paint in more sharpening and less NR in the shadows by using the brush tool in Lightroom, and that can improve things a little if you're careful, but that's a major pain in my view.
Here is another example...
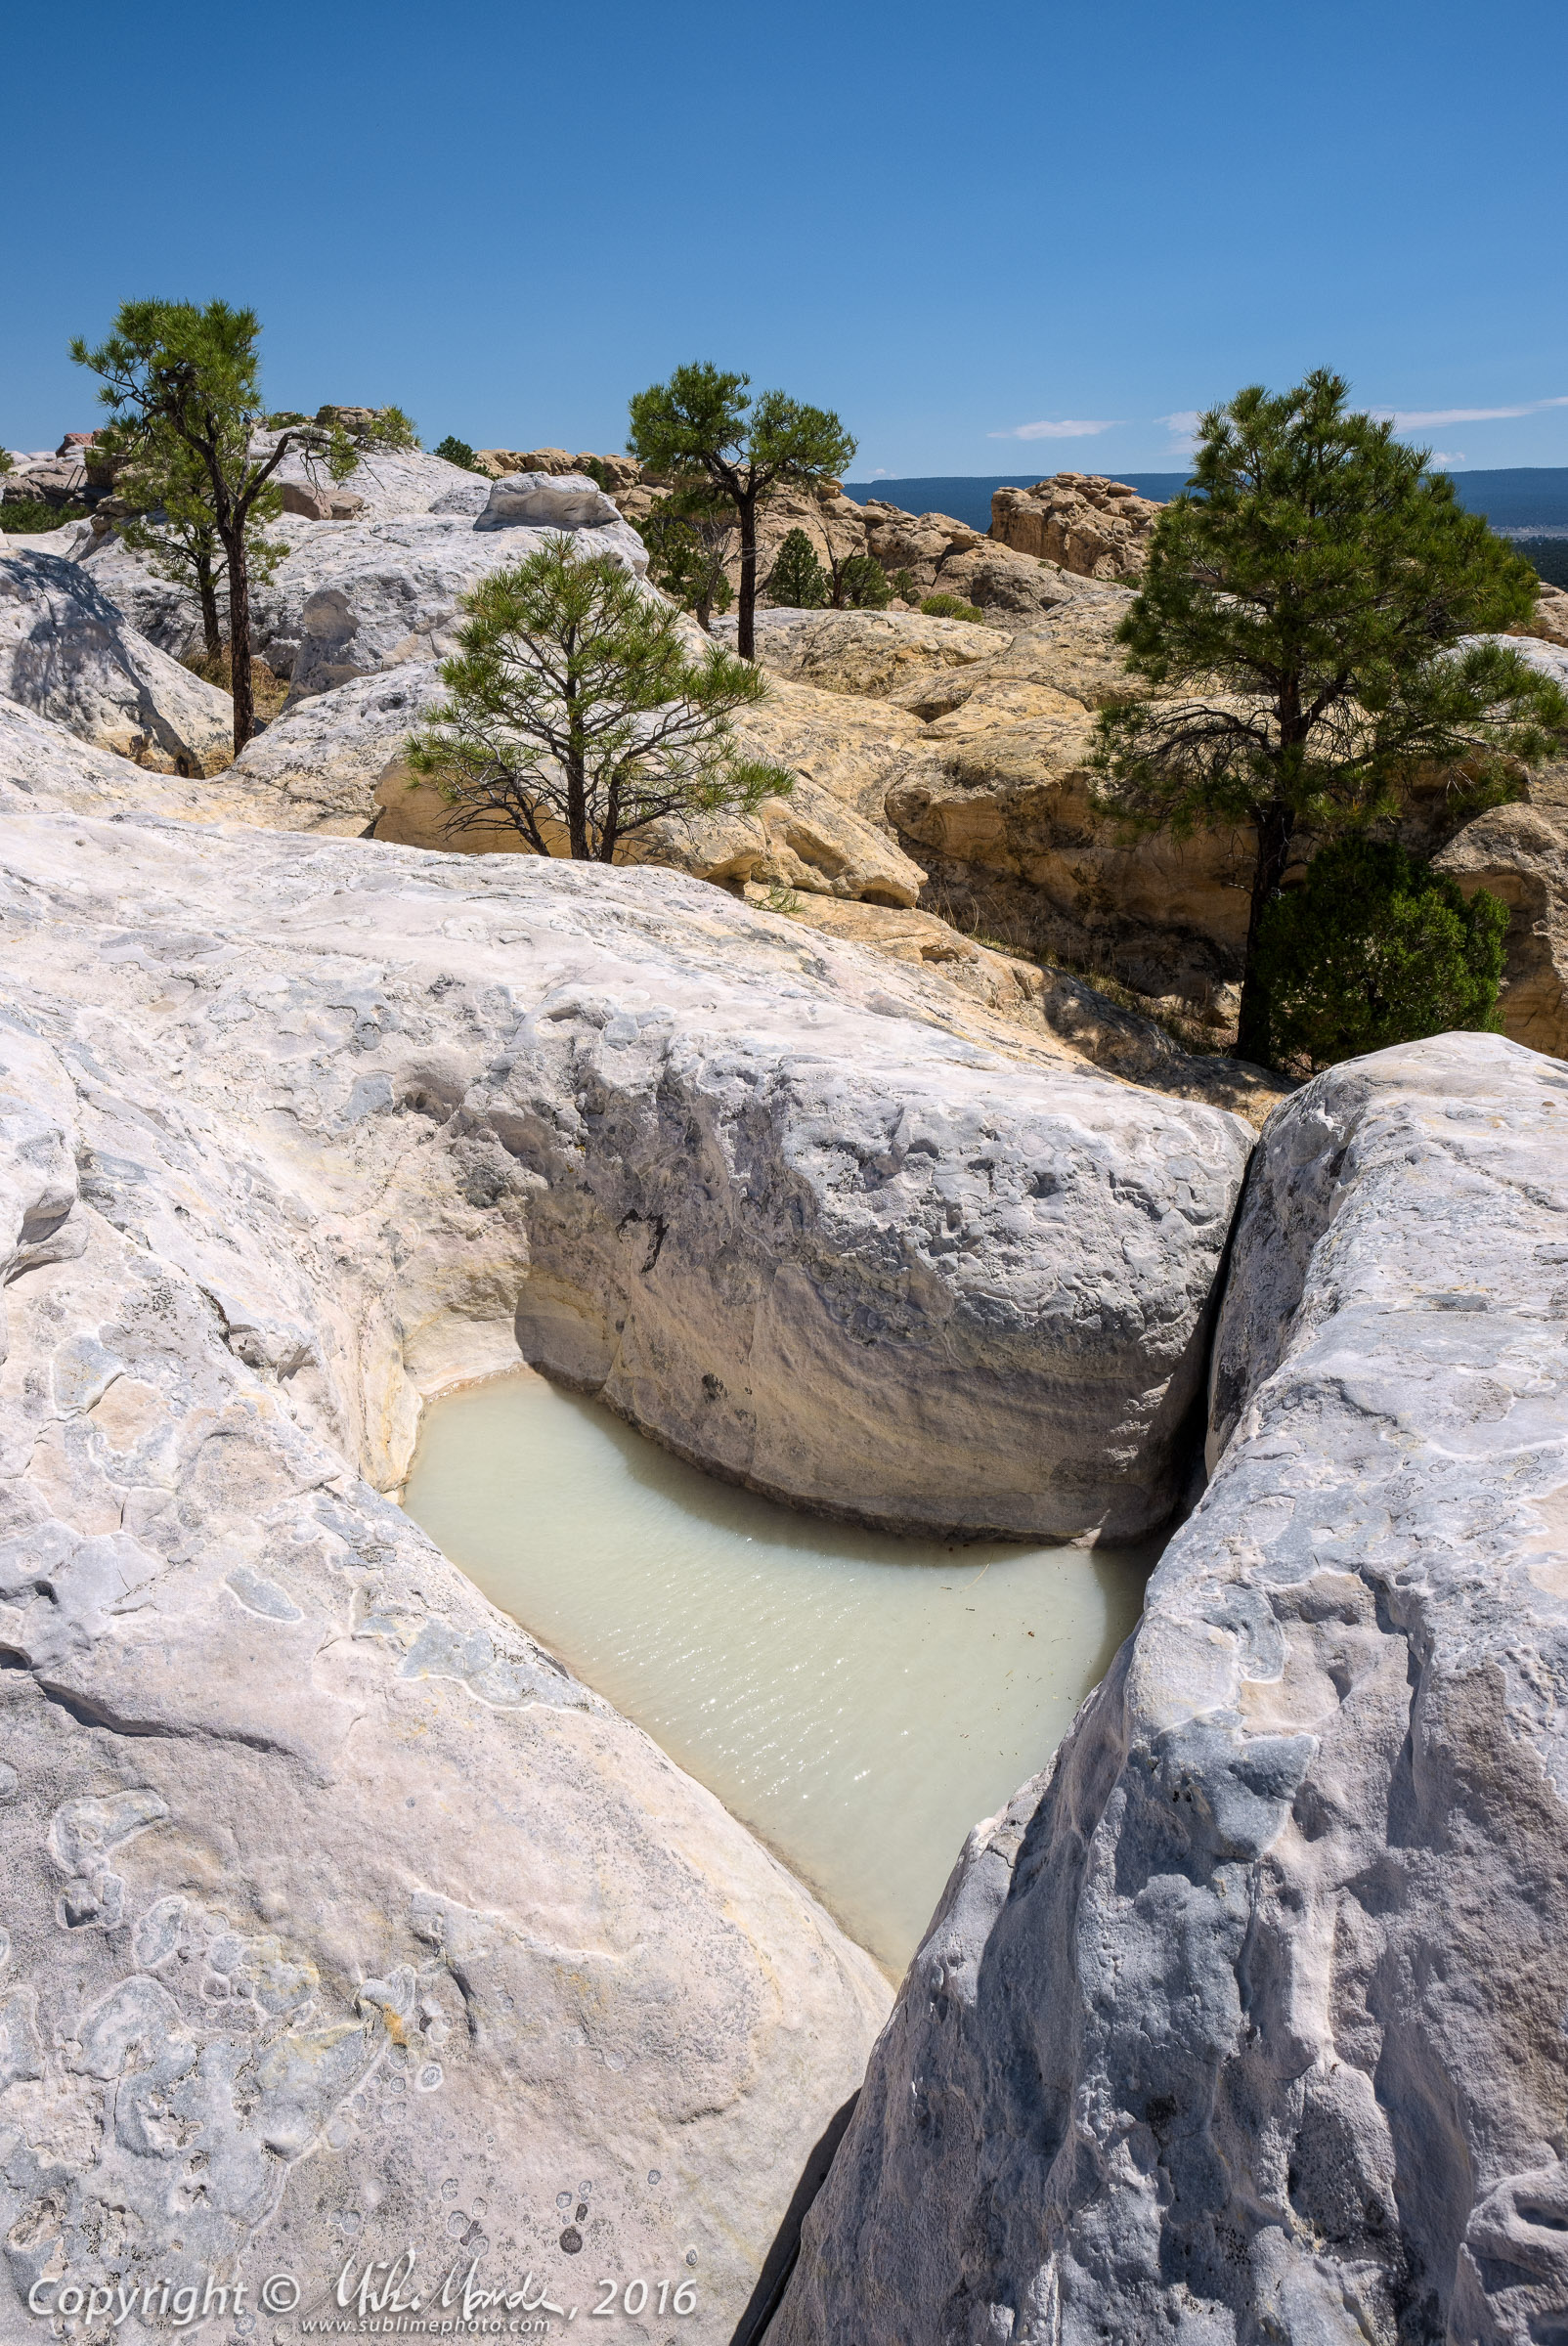
El Morrow National Monument, New Mexico
Following is a screenshot, comparing the extreme lower left corner of the shot, PhotoNinja on the left again...
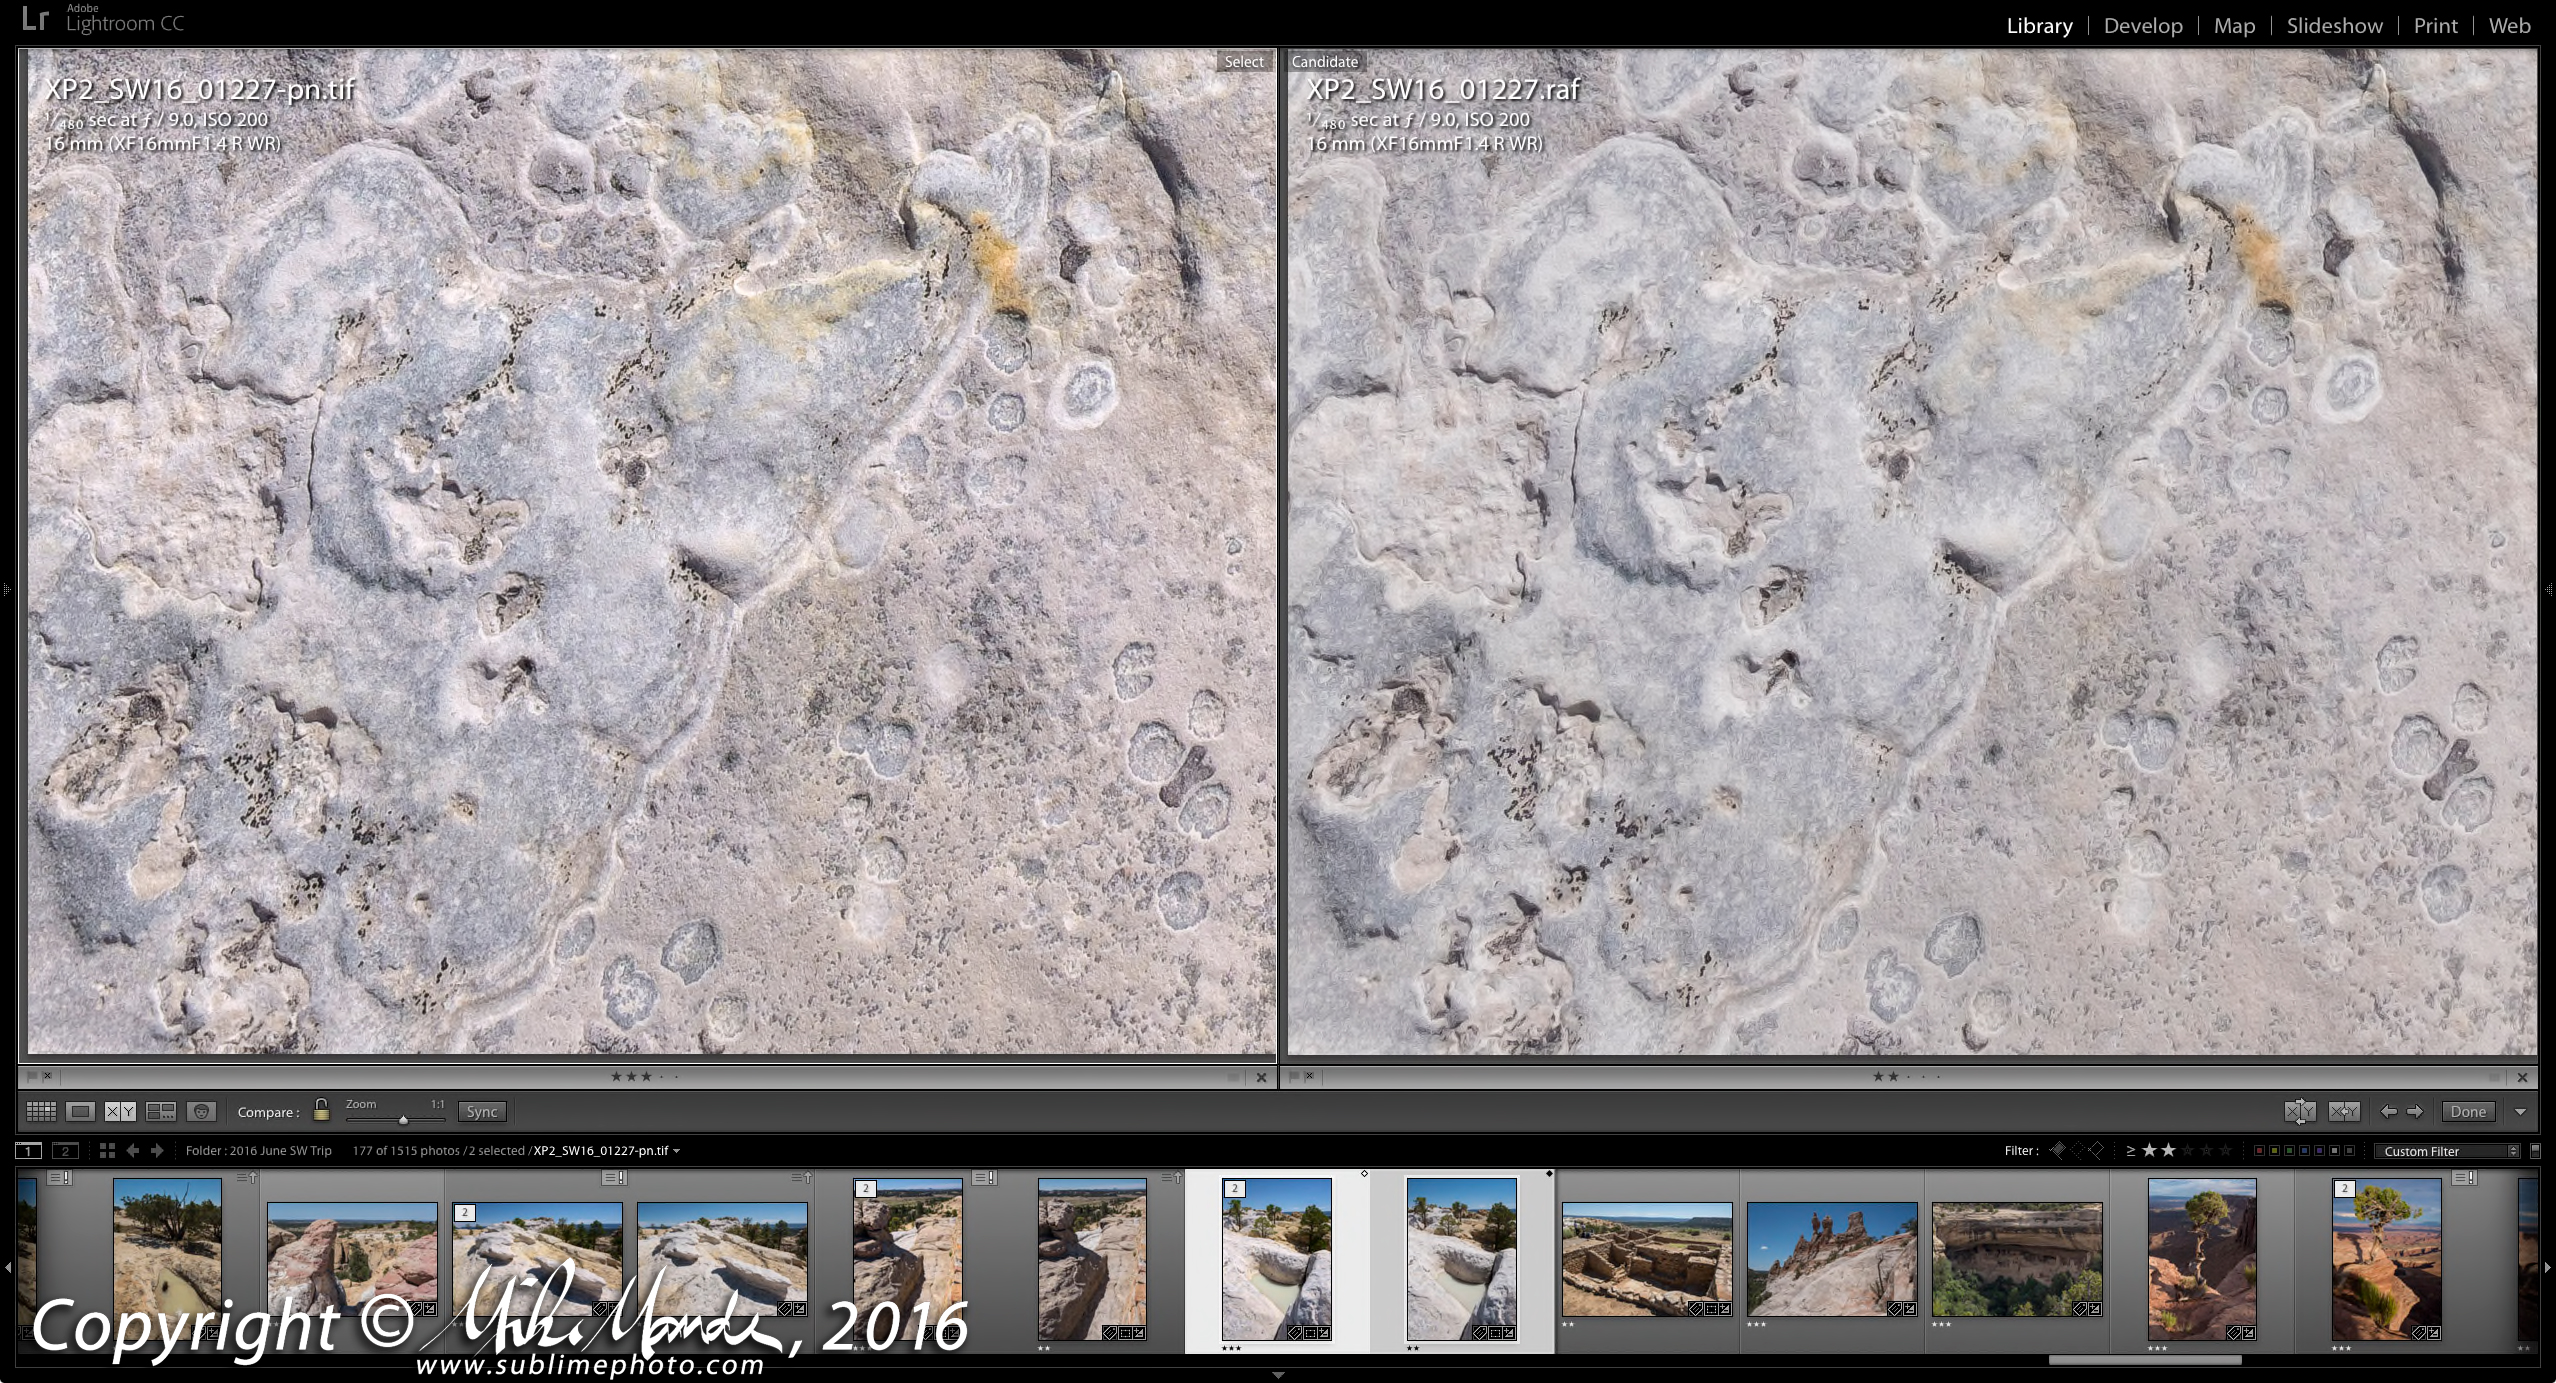
Here Lightroom is doing a lot better since we have bright detail, not shadows. On a side note, isn't that Fujifilm XF 16mm f/1.4R impressively sharp in that extreme corner?! Definitely one of the favourite lenses in my kit.
Now let's look at a different spot in the same image, the tree and bush towards the upper right...
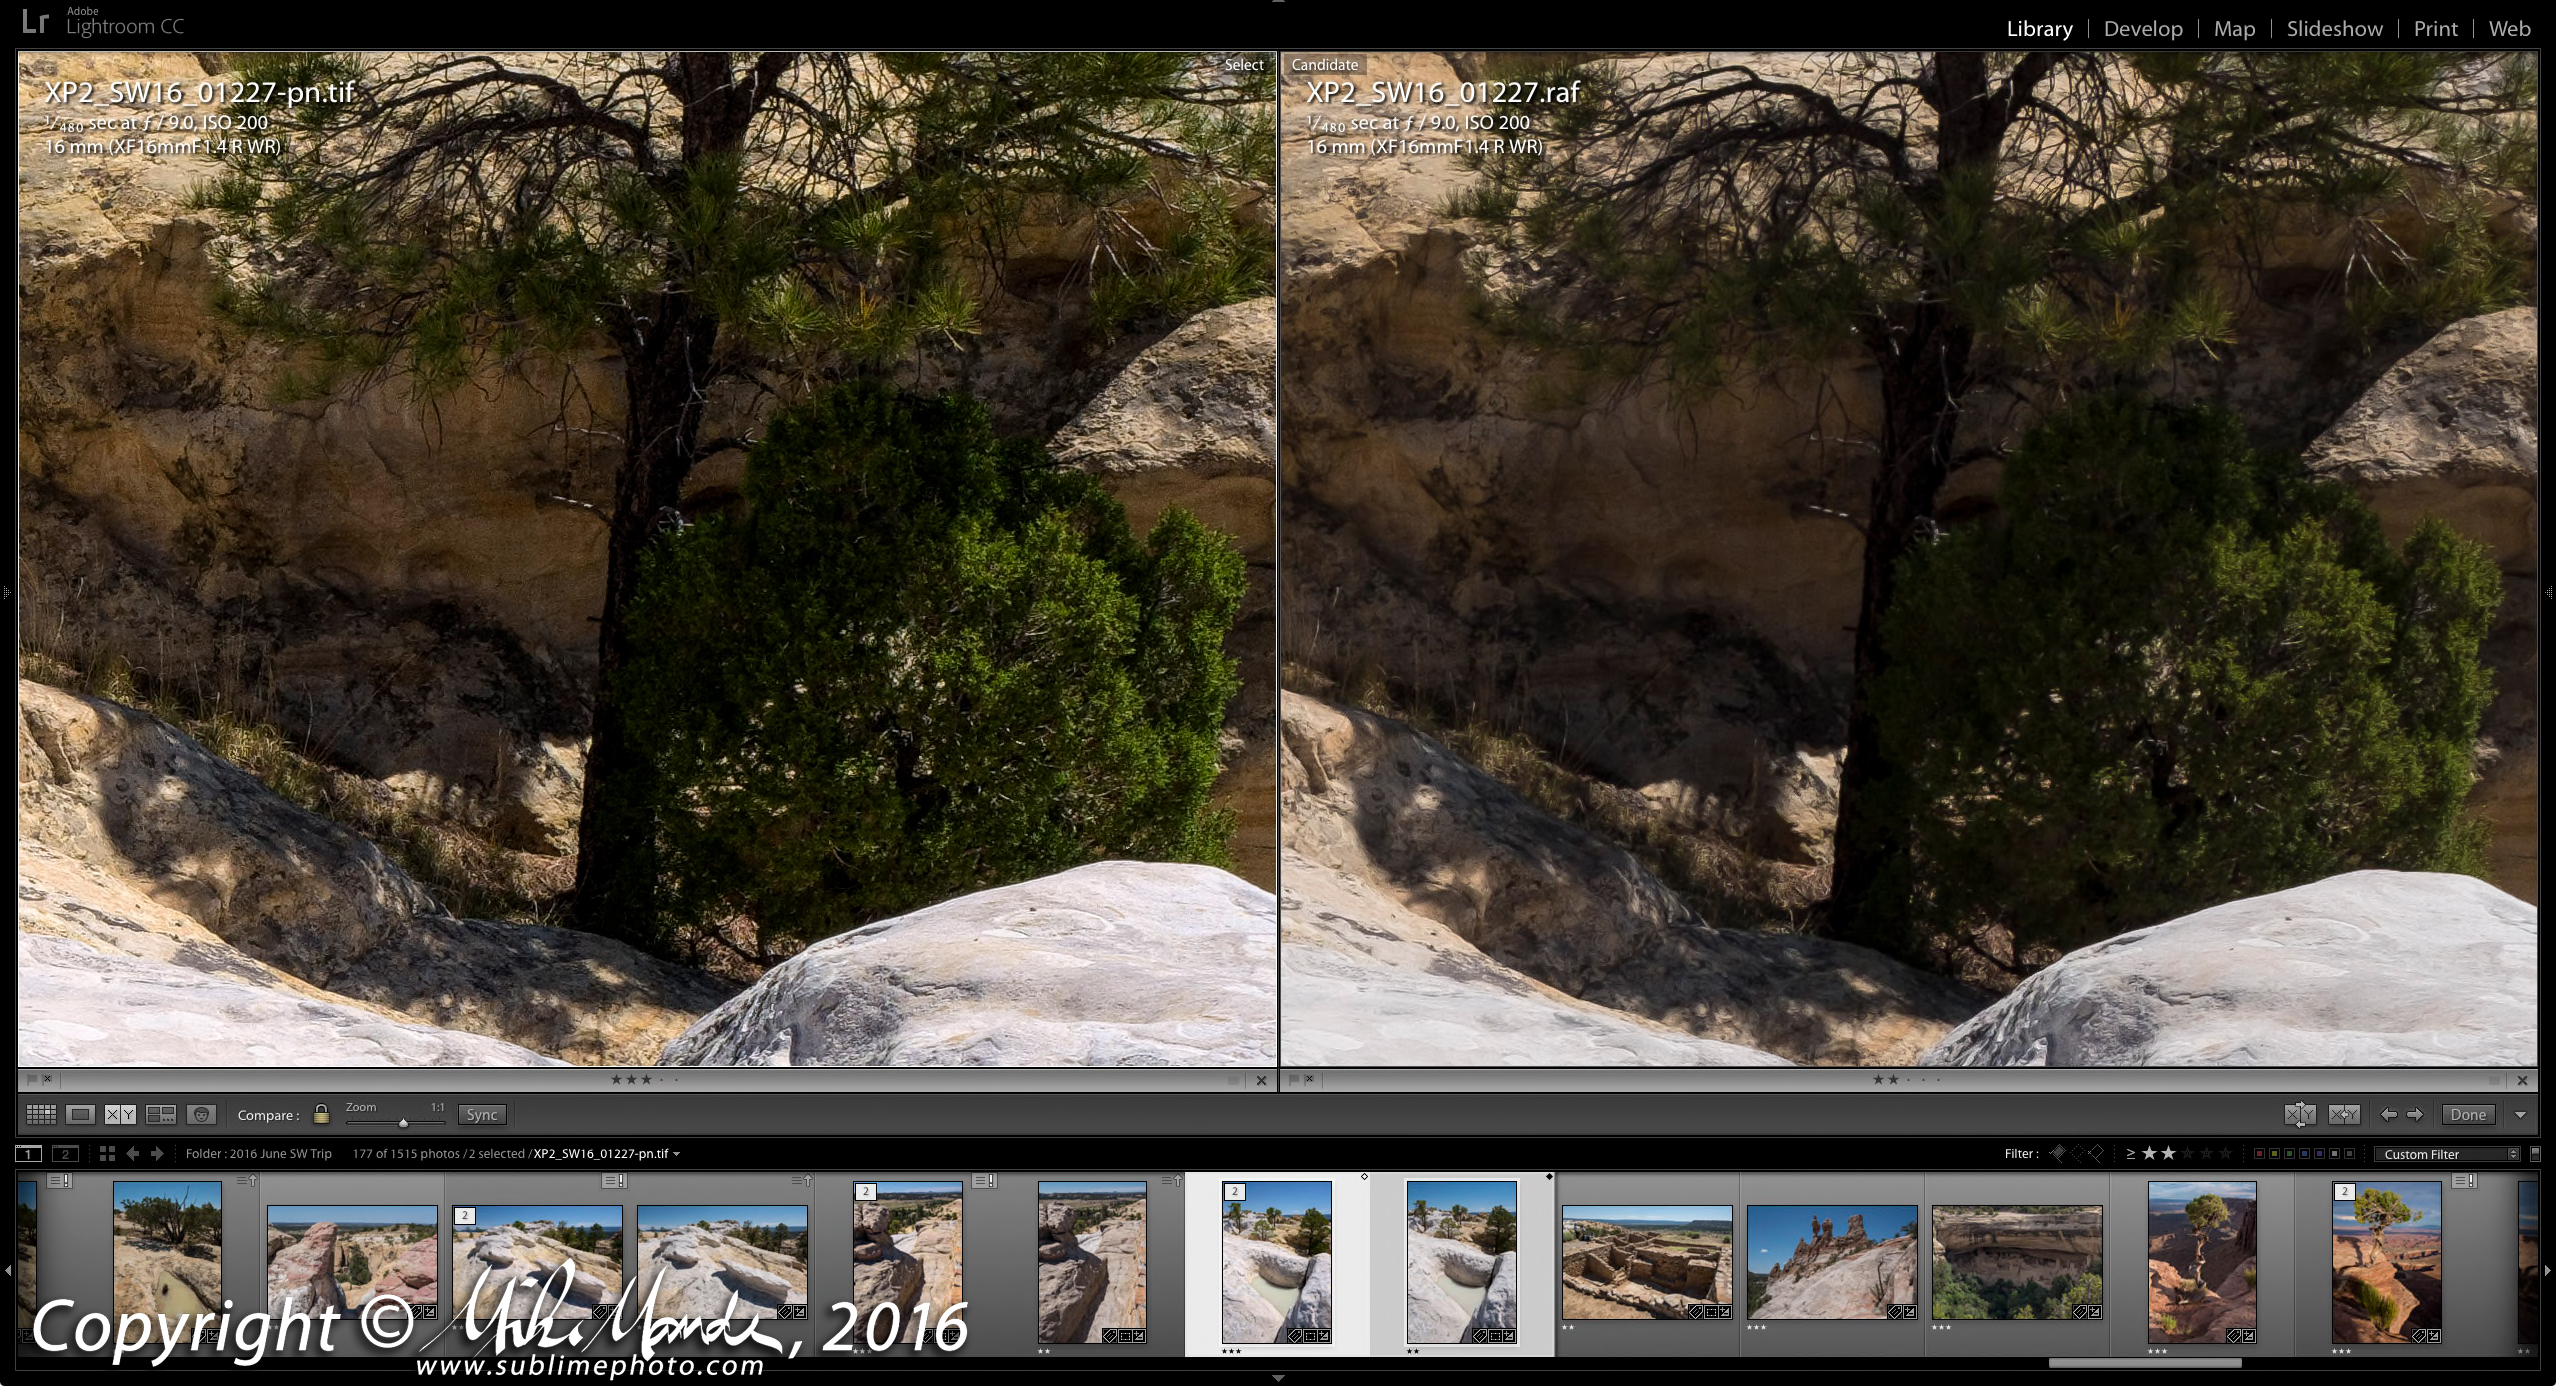
Okay, one last example...

Dead Horse Point State Park, Utah
Below is a zoom from near the centre of the image...

Here, Lightroom might be rendering the finest details even better than PhotoNinja, but... again in the shadows, the trees are smudgy looking. That said, in this shot that's a small area and does not really draw the eye overall, so the Lightroom version is fine here. Now for the tree in the lower right corner of the image...

Here it is once again obvious how much better a job PhotoNinja can do with shadow detail.
So... I think you are probably getting a pretty good idea by now how much you stand to benefit from using a different raw converter with your Fujifilm camera. I have used PhotoNinja for all these samples, since I very much like its overall colour and rendering, as well as its often amazing highlight recovery abilities, but you will get similar benefits with respect to shadow detail from Phase One's Capture One or Iridient Developer as well.
There are occasionally some slight disadvantages to this extra shadow detail perhaps. For example, in the last shot, the shaded part of the river looks a bit "gritty" at 100% zoom in the PhotoNinja version, not that you'd ever see that on anything but the very largest print, but here the Lightroom version of the shot might even be slightly preferable overall. Also, the first lightning photos ended up with a fair bit of noise in the clouds, and I had to get aggressive with the NR in Lightroom to smooth things out a little in the PhotoNinja processed TIFF. If I had just processed those through Lightroom, I likely would have ended up with a smoother sky, less noise in the brightened up and contrast boosted clouds.
Overall, I still feel Adobe Lightroom gives me the best workflow of any program out there, from import, to culling, to export, to creating web galleries - its all very fluid and efficient. However, I do wish Adobe would offer a little more user control over some raw processing parameters. I think a "Protect Shadows" slider, as mentioned earlier, would go a long way towards offering the user a simple way of altering how much differential processing is being performed in the shadow areas of a photo, and could make a big difference with some shots, especially from those taken with Fujifilm X-Trans sensors as you've seen here. If Adobe could just give their software this one last tweak, I think I would be very happy using it for the vast majority of my photos without necessitating a round-trip into a third-party raw converter.
Hopefully you've found these examples useful. Lastly, here is a link to PictureCode's website, the makers of PhotoNinja: PictureCode

0 comments:
Post a Comment